Tayacan.dk
Created: 2023-10-07
Making pretty desktop backgrounds with Blender Geometry Nodes
One of my hobbies is making 3D models in Blender, a free and open source program. Until now, I've mostly been making low-poly models, sometimes with animations, for the purpose of putting them in video games. As a consequence of this focus, I've only explored a fraction of what Blender can do.
I've had to take a couple of weeks off work due to a really annoying throat infection, and I've been spending some of that time learning some new tricks in Blender. Mainly, I've been curious about Geometry Nodes for a while, and in the course of learning about them, I've also picked up a bit of knowledge about Shader Nodes and rendering. That is to say, rather than exporting my models and using them in a game engine, limited to real-time rendering, I've been letting Blender chew on them for anywhere from 15 minutes to an hour in order to spit out a single pretty image.
So I guess I'm making myself some desktop backgrounds.

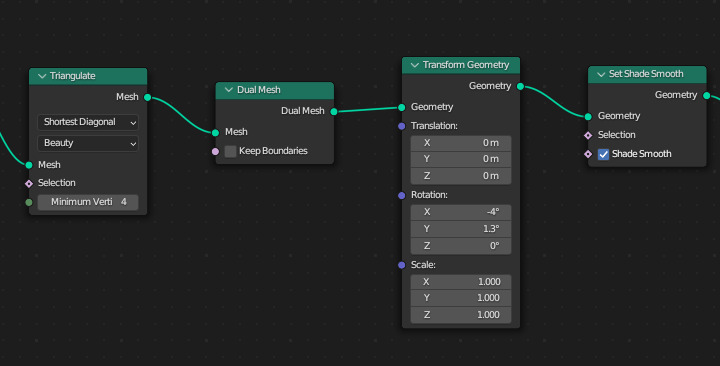
Geometry Nodes is essentially a (visual) programming language for 3D geometry. A program, or Node Tree, consists of connected node, each which takes a number of inputs and produce a number of outputs. Output from one node becomes input for some other node. For example, the Transform Geometry node takes some geometry as input, along with vectors describing translation, rotation, and scaling, and it outputs some geometry, which it produces by applying – for example – the input rotation to the input geometry. Here's an example of such a node:
These Node Trees can become pretty big and complex — here's the full tree that the above example is taken from, and that's a pretty simple one:
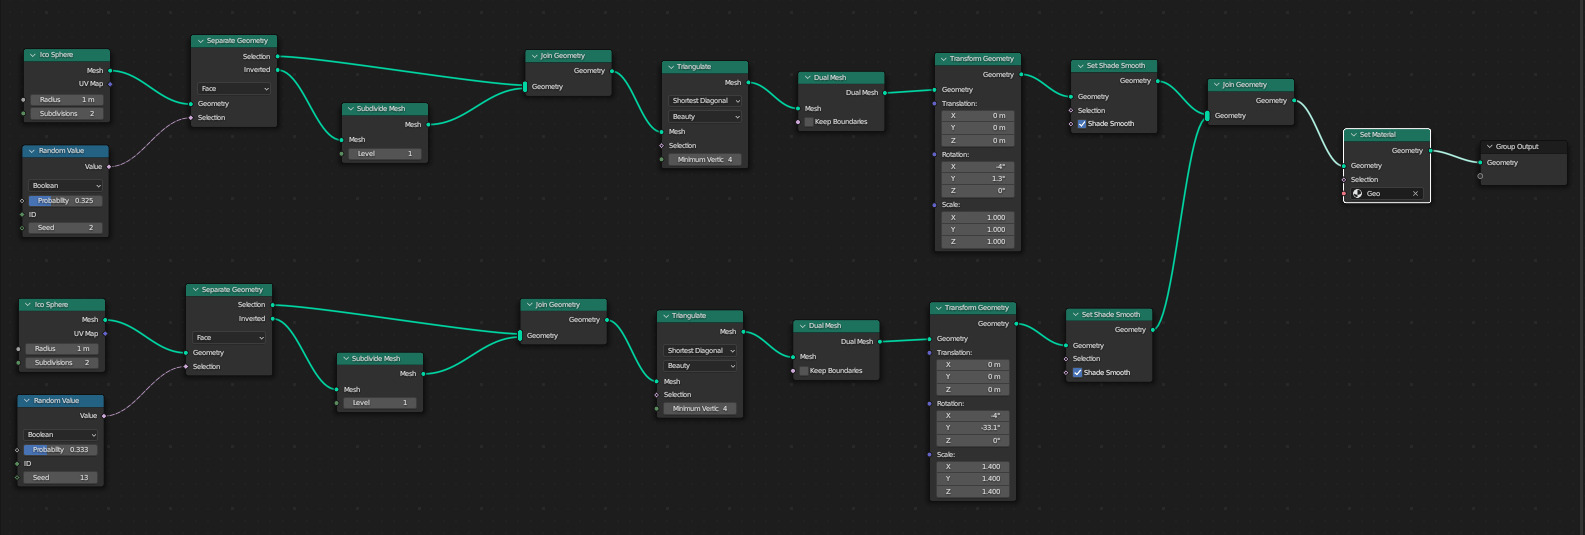
What we get out of dealing with this complexity is geometry that is configurable. Anytime we want to tweak something, we can come back to any node in the tree and change its settings, connect it up differently, or replace it with something else. With ordinary modeling, if you want to go back and change something you did a while ago, you have to undo back to that point and then redo everything, if your undo history is even long enough. With a non-destructive workflow, such as Geometry Nodes, most of your changes to the geometry are in the node tree.
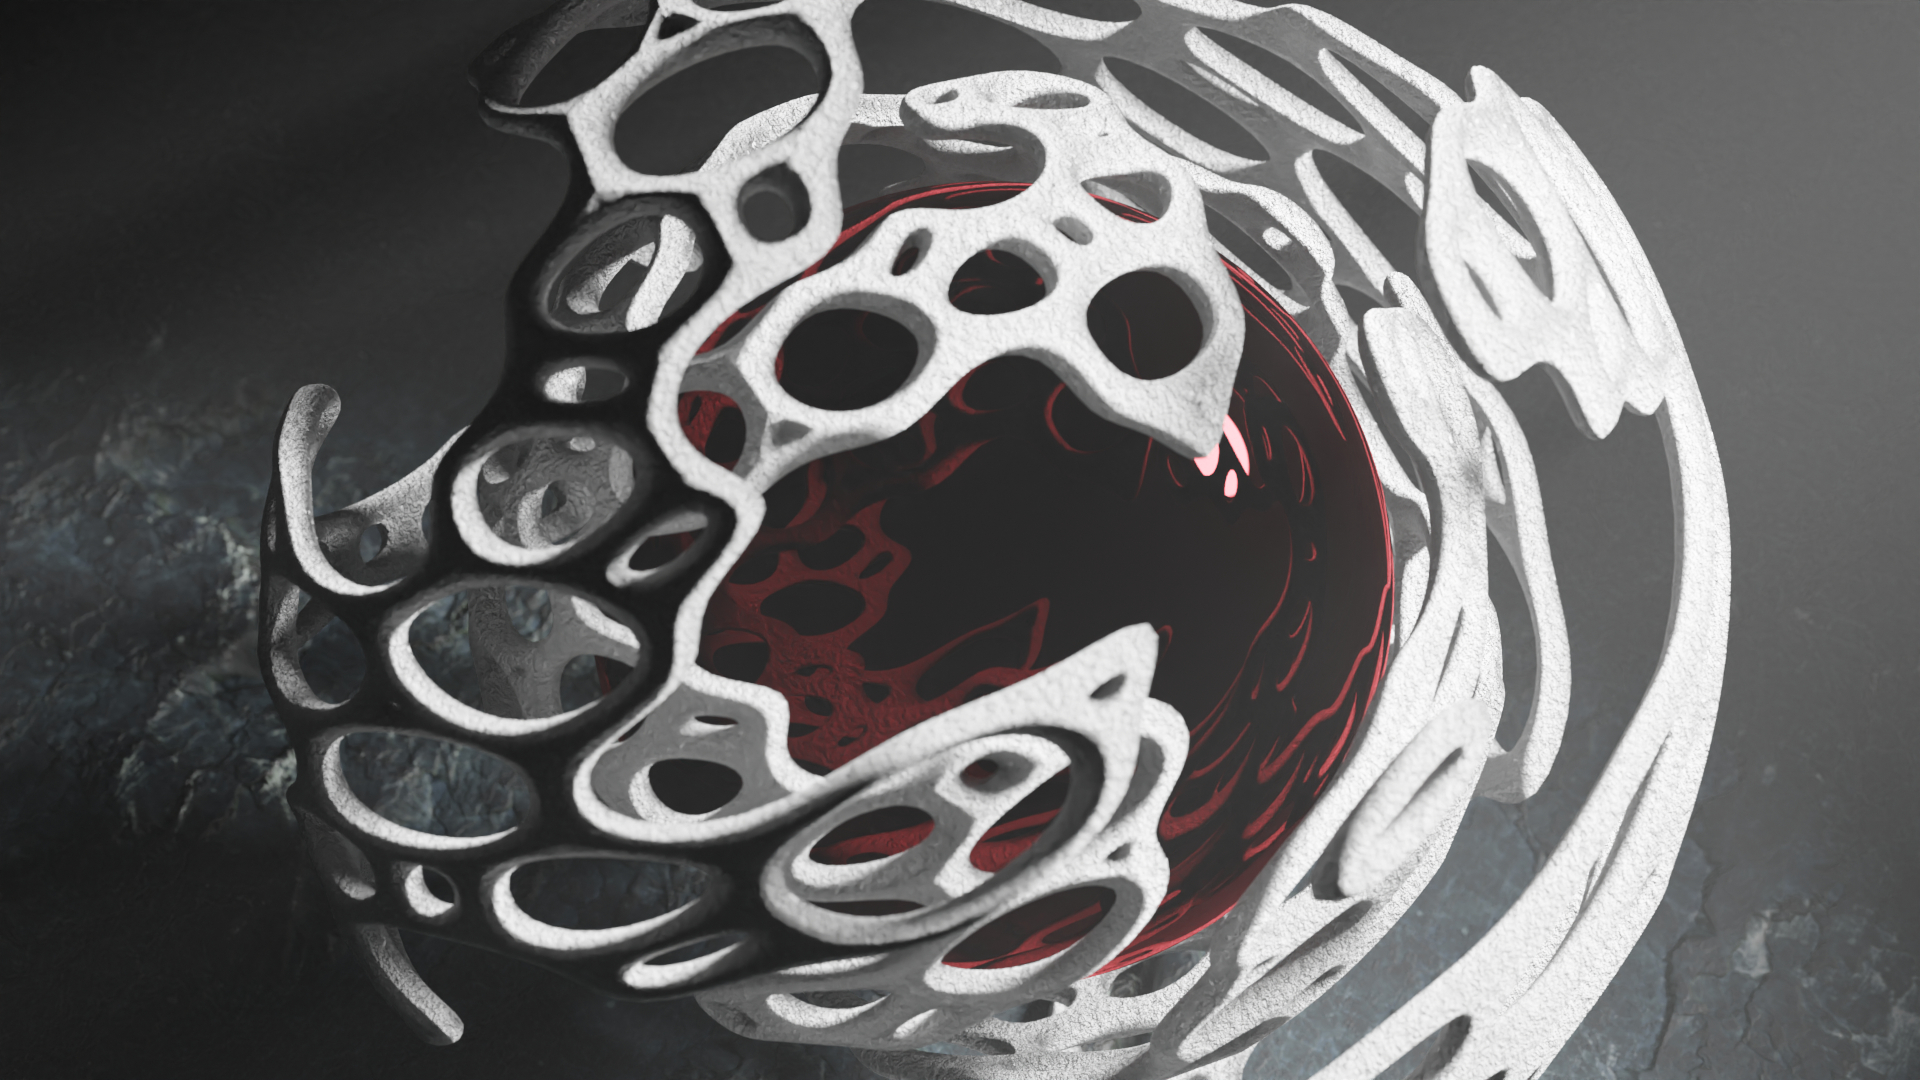
Geometry nodes can't do everything — I quickly found out that there's no way to do a loop cut (a very common operation when modeling) in Geometry Nodes — but it can do a lot. The cage in the image below is made with Geometry Nodes, and uses a rusty metal texture set downloaded from AmbientCG. However, when applying textures to a model, we need some way to tell the program which parts of the (flat, two-dimensional) texture should be applied to which part of the three-dimentional object.
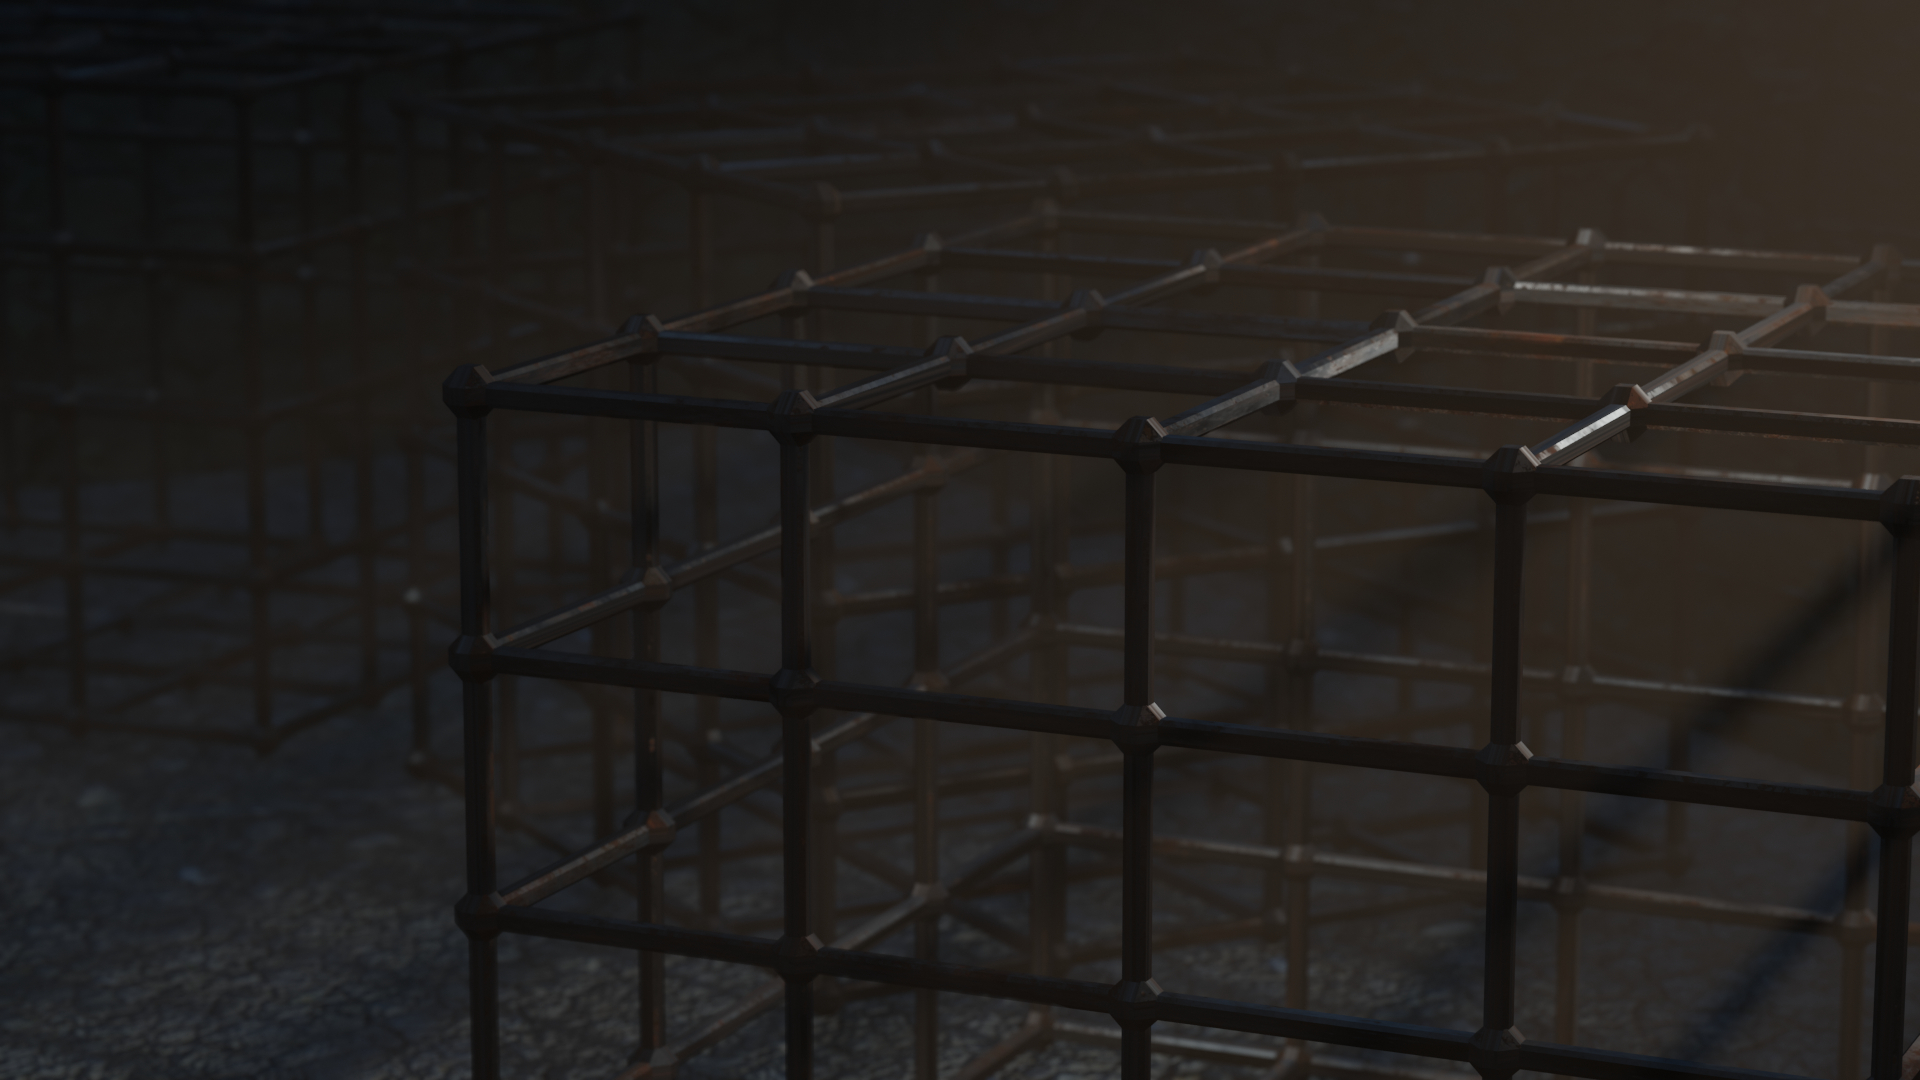
Normally, this is done by manually UV unwrapping the object — essentially, cutting it up and unfolding it as if it was made of paper, and then using that to map the texture onto the object. With procedurally generated geometry, there's no way to manually tell Blender how to do the unfolding. Fortunately, Geometry Nodes has a UV unwrap node, which takes as input a selection of edges, marking where it's allowed to cut the object in order to unfold it.
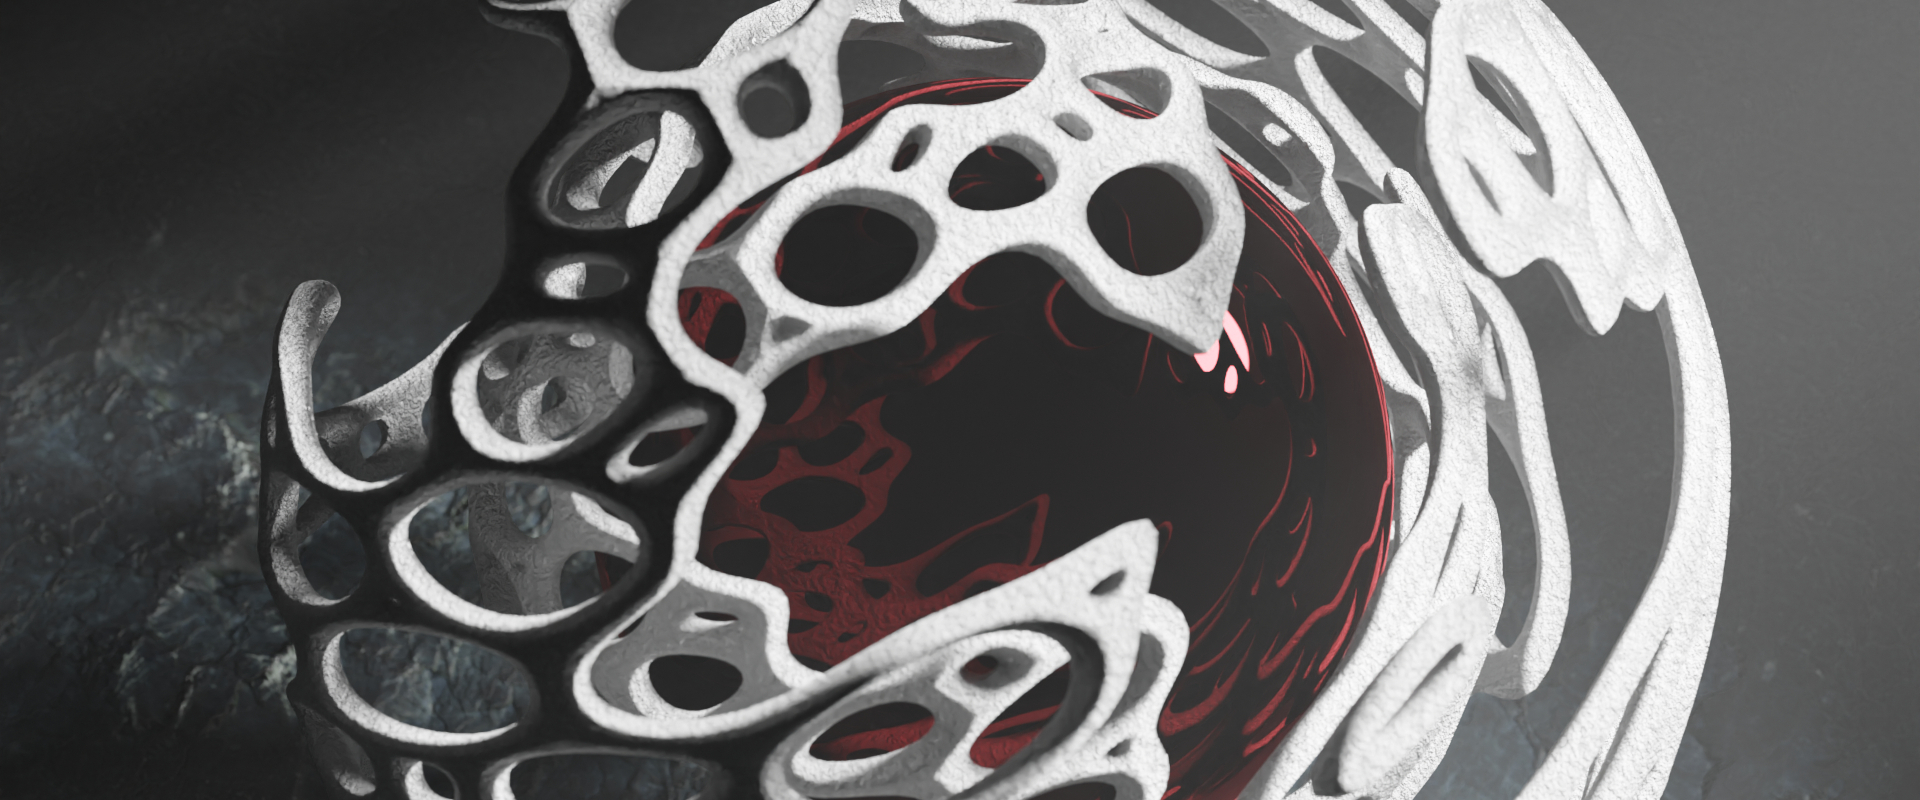
I think this post is long enough, and I'm at risk of trying to explain how these images are made in more detail than I intended. Suffice it to say that it's a lot of fun. I'll leave you with the full version of the header image — do feel free to use it as a desktop background.